Visual Studio is the most productive IDE I have ever used so far. I have been using VS since the 2003 version and the amount of improvements this IDE has gone through till now is absolutely stunning. No other IDE gives so much importance to Productivity than VS, Period. Though there are umpteen number of changes in the latest version (VS 2017) right from installation experience, to a lot of tooling improvements, one aspect which I loved the most is the Docker Support for Asp.Net Core applications. Deploying and debugging an asp.net core application running within a Docker container have never been so easy. In this post, I will guide you how to add Docker Support for Asp.Net core application in VS 2017 and debug the application running within the Linux container.
Prerequisites :
Below are the two components that are required to be installed in the machine.
- Docker for Windows
- Visual Studio 2017 (its in RC as of this writing)
The installation behaviour of VS 2017 is completely new and different than the previous versions. With this version, you get to choose what kind of workloads you want to install and only those get installed. So, to get dotnet core tooling and docker support you have to select that workload from the installation screen as shown below:
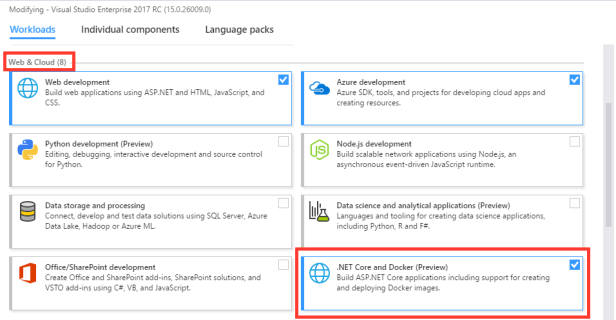
Fig 1.0 Installing .Net core and Docker tools in VS 2017
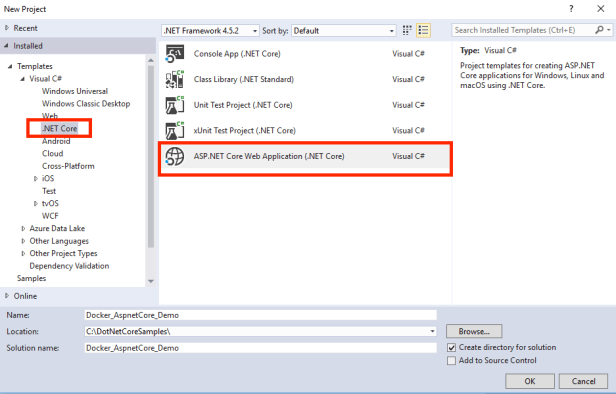
Step 1 : Create a new asp.net core project
Click File ->New Project -> .Net Core -> ASP.NET Core Web Application
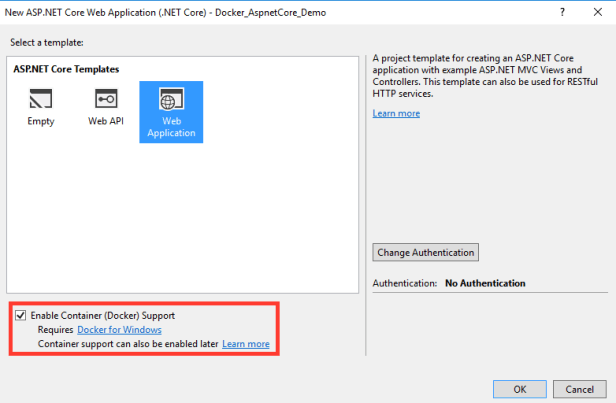
Step 2 : Enable Docker Support for Asp.Net core application
As you can see in the screenshot below, once you select the template of your application (Web API or MVC based WebApplication), we get an option to Enable Docker support. It’s that easy to dockerize your asp.net core application. In case you don’t want to enable docker stuffs now, you can always uncheck and then configure later.
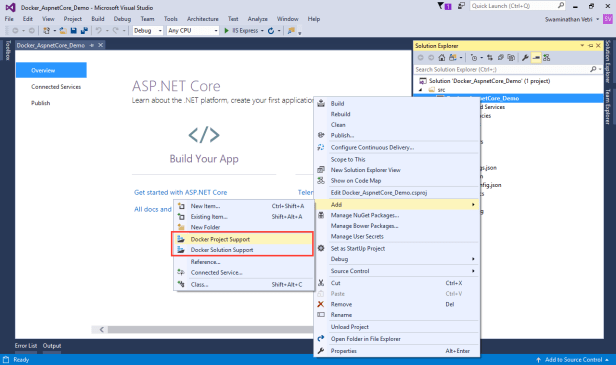
In case, you didn’t check the “Enable Container (Docker) Support” while creating the application, or if you want to add docker support for an existing application, all you need to do is, just right click the project and Add -> Docker Project Support / Docker Solution Support as shown below. If you have a solution with multiple asp.net core projects, you can select Docker Solution Support
Once the Docker Support is enabled for the application, VS will automatically add the highlighted files in the below screenshot
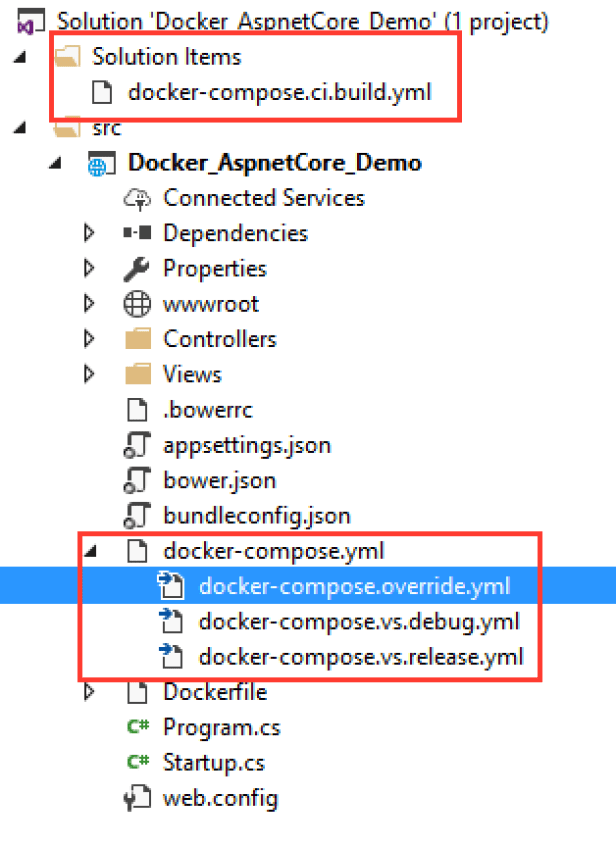
Also the debug toolbar will show the new option “Docker” next to the Play button.

Step 3 : Deploy the app to containers and Debug
Simply select “Docker” as the destination and click the play button. If you are running the application for the first time, it might take some time to pull the docker image specified in the Dockerfile, from the next run, it should be up and running faster. Add breakpoints to the appropriate files and you should see the breakpoint getting hit as you browse through those pages in the application
As you can see, this is definitely a great tooling experience for docker in VS. This helps a lot in debugging and troubleshooting errors in your apps that runs within containers. Once everything is done, you can very well build an image for the application that will be guaranteed to run in any machine that has docker in it. This is just one of the various features that VS 2017 offers and there’s still a lot more in Docker tools, more on those in a future post

[…] Debugging Asp.Net core apps running in Docker Containers using VS 2017 […] […] Source: Debugging Asp.Net core apps running in Docker Containers using VS 2017 – wannabeegeek […]
[…] Debugging Asp.Net core apps running in Docker Containers using VS 2017 […] […] Source: Debugging Asp.Net core apps running in Docker Containers using VS 2017 – wannabeegeek […] […] Debugging Asp.Net core apps running in Docker Containers using VS 2017 […]
[…] Debugging Asp.Net core apps running in Docker Containers using VS 2017 […] […] Source: Debugging Asp.Net core apps running in Docker Containers using VS 2017 – wannabeegeek […] […] Debugging Asp.Net core apps running in Docker Containers using VS 2017 […]