In one of my previous posts, I showed how to scaffold a basic asp.net core web api using yeoman on Mac. In this post, I will show how to extend the same web api to make use of EF Core 1.0 to talk to a Sqlite DB. Since EF Core 1.0 being a cross platform OR/M tool, its super easy for us to use that in the asp.net core web api application for data access. Assuming the web api created before is up and running, I will showcase only the steps required to include EF Core,Sqlite provider and other necessary modifications in the app to consume both of them. I will be using EF Code first approach (i.e, create a model in .net code and then create Db Objects from the model) in this post.
Step 1 : Add the required Entity Framework packages
To add EF Core capabilities to the application, we need to install the below packages from Nuget. To do this, add the below set of lines to the dependencies section of the project.json file.
"Microsoft.EntityFrameworkCore.Design" : "1.0.0-preview2-final",
"Microsoft.EntityFrameworkCore.Sqlite": "1.0.0",
The first package is used to provide design time features of EF core and the second one is the actual Sqlite DB provider that helps us in talking to Sqlite DB.
We also need to add the EF tools which provides the command line options for the Entity framework. Without this tool, we wouldn’t be able to trigger dotnet ef commands from dotnet cli.
Add the below lines of code under tools section of the project.json file
"Microsoft.EntityFrameworkCore.Tools": "1.0.0-preview2-final"
If you have the dotnet webapi project opened in VS Code, it will automatically trigger a dialog to restore the newly added packages. Click yes and restore the packages. If you are using any other editor, open terminal, navigate to the root directory of the app, and run the command dotnet restore
Step 2 : Understanding EF Commands
Once the package restoration is complete, run the below command to make sure EF tools are installed properly.
dotnet ef --help
bash-3.2$ dotnet ef --help
Project ef-aspnetcore-demo (.NETCoreApp,Version=v1.0) was previously compiled. Skipping compilation.
Entity Framework .NET Core CLI Commands 1.0.0-preview2-21431
Usage: dotnet ef [options] [command]
Options:
  -h|--help                      Show help information
  -v|--verbose                   Enable verbose output
  --version                      Show version information
  --assembly <ASSEMBLY>          The assembly file to load.
  --startup-assembly <ASSEMBLY>  The assembly file containing the startup class.
  --data-dir <DIR>               The folder used as the data directory (defaults to current working directory).
  --project-dir <DIR>            The folder used as the project directory (defaults to current working directory).
  --content-root-path <DIR>      The folder used as the content root path for the application (defaults to application base directory).
  --root-namespace <NAMESPACE>   The root namespace of the target project (defaults to the project assembly name).
Commands:
  database    Commands to manage your database
  dbcontext   Commands to manage your DbContext types
  migrations  Commands to manage your migrations
Use "dotnet ef [command] --help" for more information about a command.
You can use the --help switch for any of the commands and get to know how to use them.
Step 3 : Add Model and DbContext classes
Now that required tools are in place, its time to create our model and the DbContext classes. Models are nothing but the POCO classes for which tables will be created in the DB. DbContext in simple terms is the bridge that helps us in establishing connection and doing all Db operations like querying, saving data etc., I am going to create a TodoItem model that holds the TodoItem 🙂
using System;
using System.ComponentModel.DataAnnotations;

namespace demo_web_api.Models
{
 public class TodoItem
 {
 [Key]
 public int TodoId { get; set; }
 public string Description { get; set; }
 public string DueDate { get; set; }
 public bool isDone { get; set; }
 }
}
Note : I have used the attribute [key] on top of the property TodoId to explicitly convey EF that its the primary key property. You can also use convention based key, to do that, define a property in the format <Type>Id ie., in our case, TodoItemId
Next is to create a DbContext.
using demo_web_api.Models;
using Microsoft.EntityFrameworkCore;

public class TodoDbContext : DbContext
{
 public DbSet<TodoItem> TodoItems { get; set; }

protected override void OnConfiguring(DbContextOptionsBuilder optionsBuilder)
 {
 optionsBuilder.UseSqlite("Filename=./Todo.db");
 }
}
The line optionsBuilder.UseSqlite("Filename=./Todo.db"); tells EF to use Sqlite as DB with the appropriate file to persist the data. Incase, there is a need to use a different DB like postgres, MySql etc., this is the line that has to be changed later.
Step 4 : Add migrations and update database
Migrations allows us to have an ordered set of steps that describe how to upgrade (and downgrade) our database schema. Each of these steps, known as a migration, contains some code that describes the changes to be applied. This can be achieved by running the below command:
dotnet ef migrations add FirstMigration
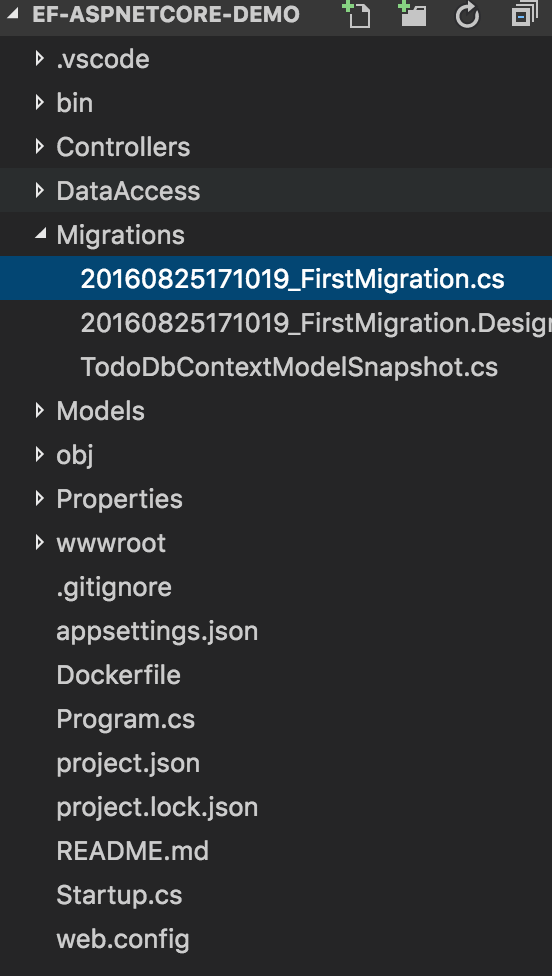
This will create a folder called migrations within the project’s root directory and create csharp classes with the Migration name we specified in the command.
Next is to update this migration to the Db. This is the crucial step as this is when the actual Db objects are created from the models we specified. This can be done by running the below command.
dotnet ef database update
Step 5 : Create a repository class that makes use of EF
Add a new repository class to perform the data access operations. In this sample, I have used get, add, update, delete operations
using demo_web_api.Models;
using System.Linq;
using System.Collections.Generic;

public class TodoRepository
{
public TodoRepository()
{

}
public int AddItem(TodoItem newTodo)
{
int itemIndex;
using (TodoDbContext context = new TodoDbContext())
{
context.TodoItems.Add(newTodo);
context.SaveChanges();
itemIndex = context.TodoItems.ToList().IndexOf(newTodo);
}
return itemIndex;
}
public List<TodoItem> GetAllItems()
{
using (TodoDbContext context = new TodoDbContext())
{
return context.TodoItems.ToList();
}
}
public int UpdateItem(int index, TodoItem itemToUpdate)
{
using (TodoDbContext context = new TodoDbContext())
{
var updatingItem = context.TodoItems.Where(item => item.TodoId == index).FirstOrDefault();
updatingItem.isDone = itemToUpdate.isDone;
updatingItem.Description = itemToUpdate.Description;
updatingItem.DueDate = itemToUpdate.DueDate;
context.SaveChanges();
return index;
}
}
public bool DeleteItem(int index)
{
using (var context = new TodoDbContext())
{
var itemToRemove = context.TodoItems.ToList()[index];
context.TodoItems.Remove(itemToRemove);
context.SaveChanges();
return true;
}
}
}
Step 6 : Consume the repository in controller
For simplicity sake, I have directly used the repository instance in Controller, in the actual scenario, you will use Dependency Injection to inject repository to the controller. The modified controller class will look like the one below:
using System;
using System.Collections.Generic;
using demo_web_api.Models;
using Microsoft.AspNetCore.Mvc;

namespace demo_web_api.Controllers
{
public class ToDoController : Controller
{
static List<TodoItem> toDoItems = new List<TodoItem>();
TodoRepository repo = new TodoRepository();
[HttpGet()]
[Route("api/todo/items")]
public List<TodoItem> GetAll()
{
return repo.GetAllItems();
}

[HttpPost()]
[Route("api/todo/item")]
public int Post([FromBody] TodoItem newTodo)
{
if (newTodo != null)
{
return repo.AddItem(newTodo);
}
return -1;
}

[HttpPut()]
[Route("api/todo/{id}")]
public int Put(int id, [FromBody] TodoItem itemToUpdate)
{
return repo.UpdateItem(id, itemToUpdate);
}

[HttpDelete()]
[Route("api/todo/{id}")]
public bool Delete(int id)
{
bool isDeleteSuccessful = false;
try
{
repo.DeleteItem(id);
isDeleteSuccessful = true;
}
catch (System.Exception ex)
{
Console.WriteLine(ex);
}
return isDeleteSuccessful;
}
}
}
Step 7 : Run the application
Now that we are all set with the changes, its time to see our code in action. From the terminal, run the command dotnet run to start the web api. If everything is fine, you should see the below output.
Project ef-aspnetcore-demo (.NETCoreApp,Version=v1.0) was previously compiled. Skipping compilation.
Hosting environment: Production
Content root path: /Users/z066157/Presentations/B.Net/Aug16_UGMeet/demos/ef-aspnetcore-demo
Now listening on: http://localhost:5000
Application started. Press Ctrl+C to shut down.
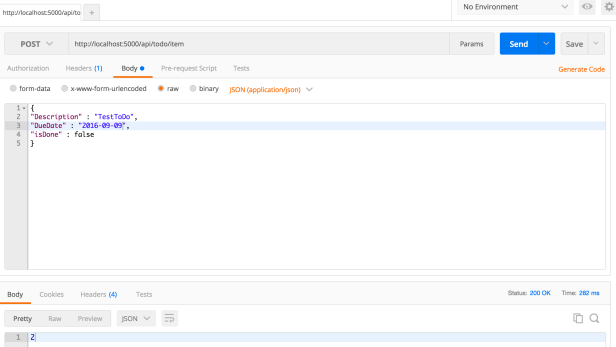
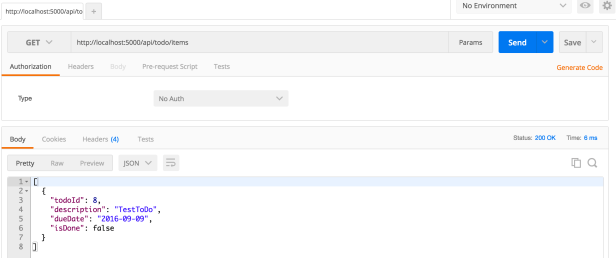
Use any of your favorite rest client to trigger the API. I am using Postman here. For the first time, the get api should return nothing. Do a post to add a new todo item and then do a get to make sure, that gets returned. The screenshots of my execution are given below:
You should also see a file named Todo.db within the bin folder.

That’s it. You just created your first Asp.net Core Web API that uses EF Core 1.0 and Sqlite.

you don’t use a very important and even bult-int dependency injection
I do use DI.. as I mentioned in the post itself, since the idea was to showcase about EF, I took the easier route of creating objects directly 😊